
Pi-hole is a great project for beginners or advanced users, it allows Network-level blocking allows you to block ads in non-traditional places such as mobile apps and smart TVs, regardless of hardware or OS. Since advertisements are blocked before they are downloaded, network performance is improved and will feel faster. Our Web interface offers control of your Pi-hole and a central place to view statistics. We also include an API for extending these stats. Instead of browser plugins or other software on each computer, install Pi-hole in one place and your entire network is protected.
Step 1:
I am going to assume you have already installed Pi OS or setup either by SSH or directly on the Pi. Firstly we are going to check that your Raspberry Pi install or other Linux distro is all up to date, we can do that with the following command:
1
sudo apt update && sudo apt upgrade -y
Step 2:
Now we are going to follow the install instructions
1
curl -sSL https://install.pi-hole.net | bash
Let the script run until you get to a pop up window
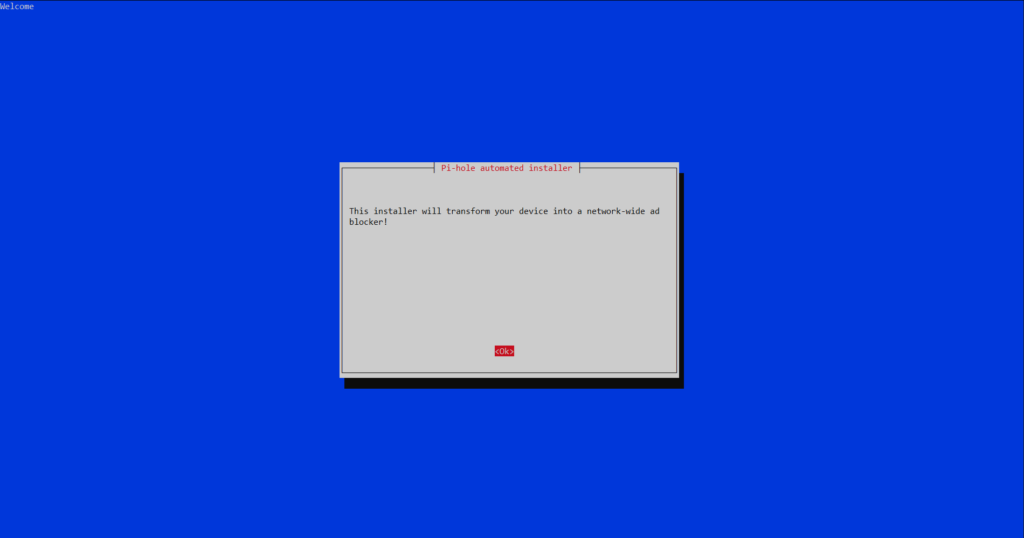 Press ‘ENTER’
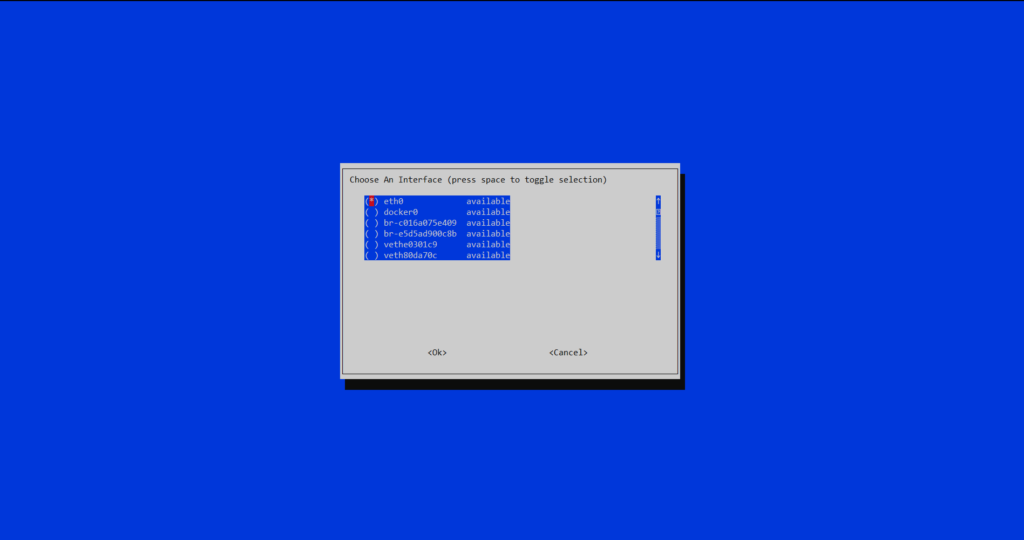
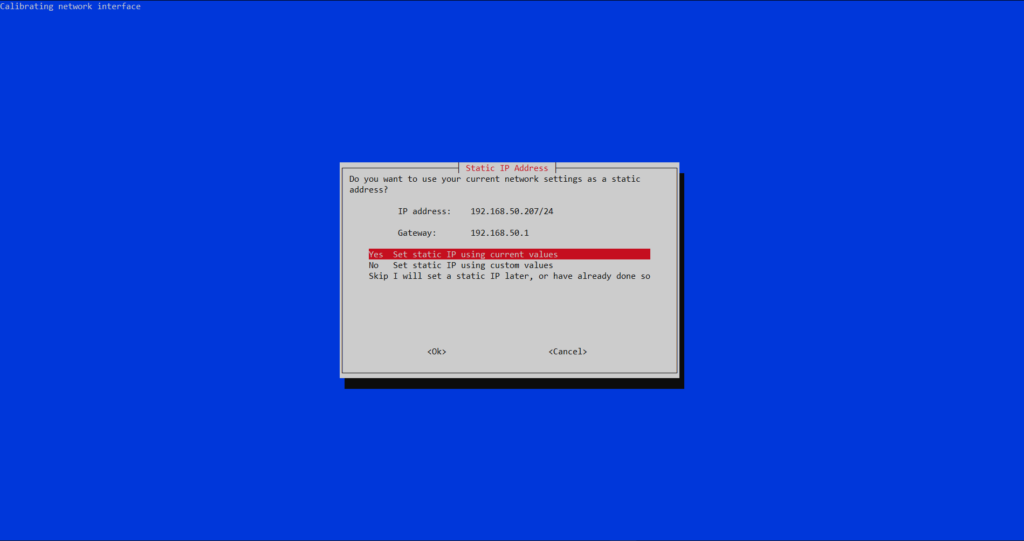
 Press ‘ENTER’ again
 You need to follow the instructions to set up DHCP reservation on your router. You can find how to do this by searching [Router Name/Model] DHCP settings, or you can fiddle around in the settings on your router. Then select ‘Yes’ with the arrow keys
 Now just enter through and select ‘Ok’
 Now select ‘Ok’ again if you are happy with that
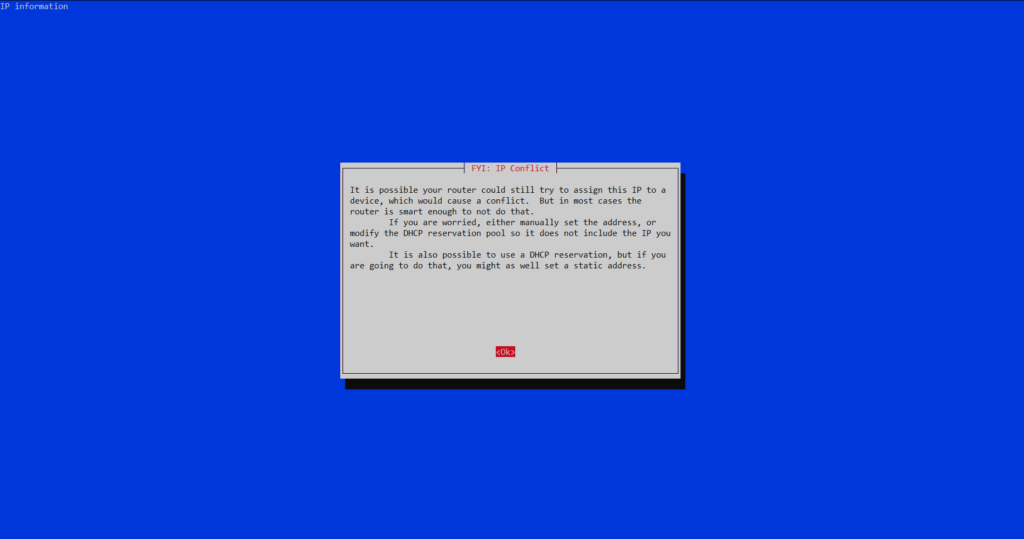 Now there a prompt and read it and take a mental note of this and then select ‘Ok’
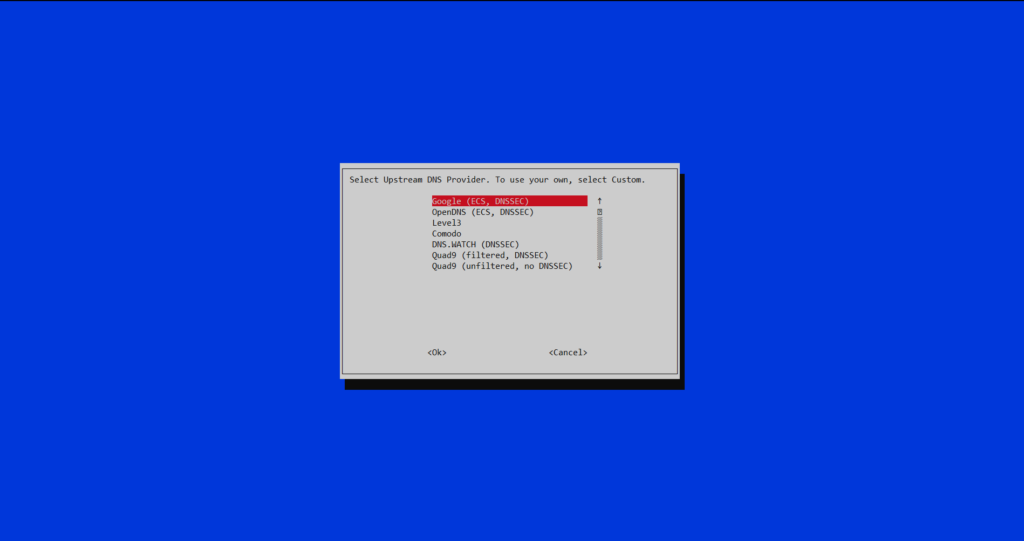 Now select your DNS provider (FYI we will be changing this later to something else anyway)
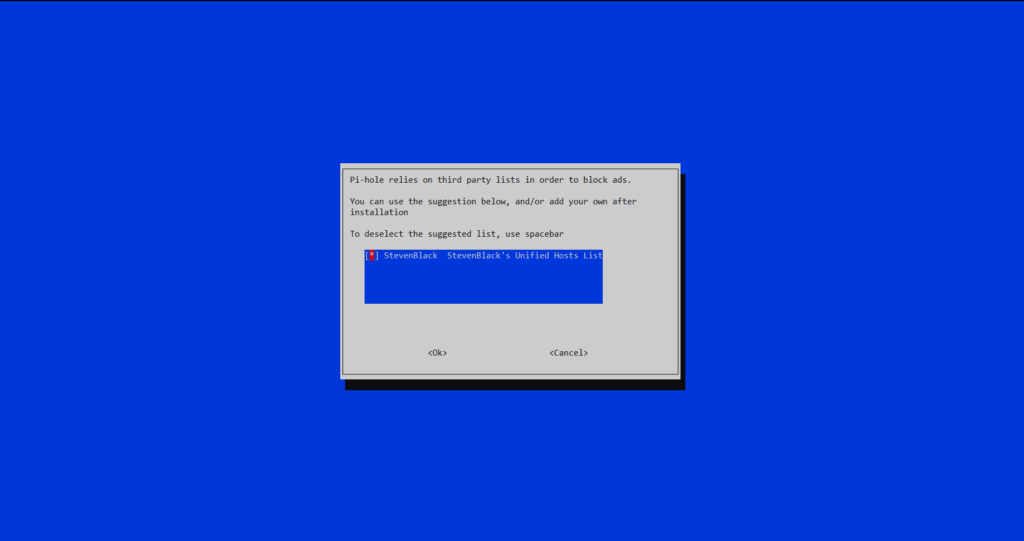 Not select ‘OK’ (FYI we will be adding to this later)
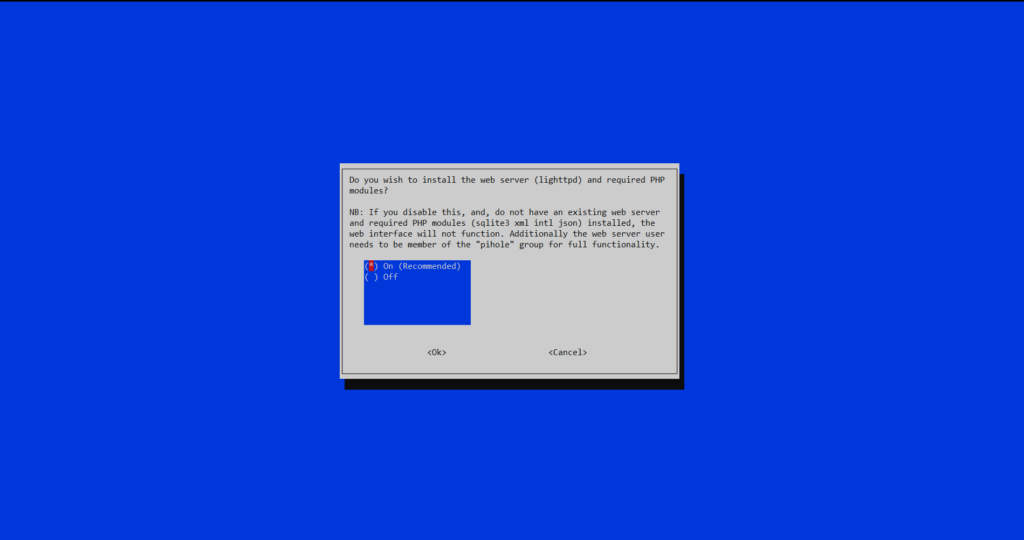
 Now ‘Enter’ on the ‘On (Recommended)’
 Now ‘Enter’ on the ‘On (Recommended)’
 You can change this late but we will select ‘Enter’ on the ‘On (Recommended)’
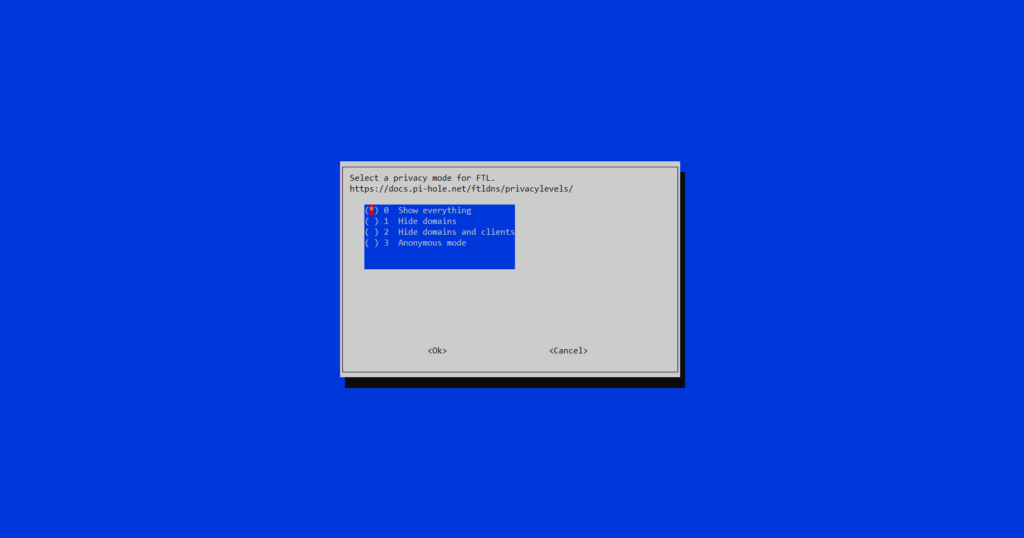 You can change this late but we will select ‘Enter’ on the ‘Show everything’
Now let it run, you will see many things pop up on screen but wait (can take up to 5 mins+ depending on hardware). Now you will see this screen and will need to take note of this password and the IP address you have setup.
 Now once you have taken note of this you can select ‘Ok’
 Once you see this screen you can navigate to you IP address you noted before
Step 3:
Now open you choice of web browser and type in you IP address into the search bar http://192.168.xx.xx/admin and type in your admin password from before.
Step 3.1 (optional):
If you would like to change your password you can use the terminal, you need to type in the following command
1
pihole -a -p Enter New Password (Blank for no password): [New Password Enter Here]
Step 4:
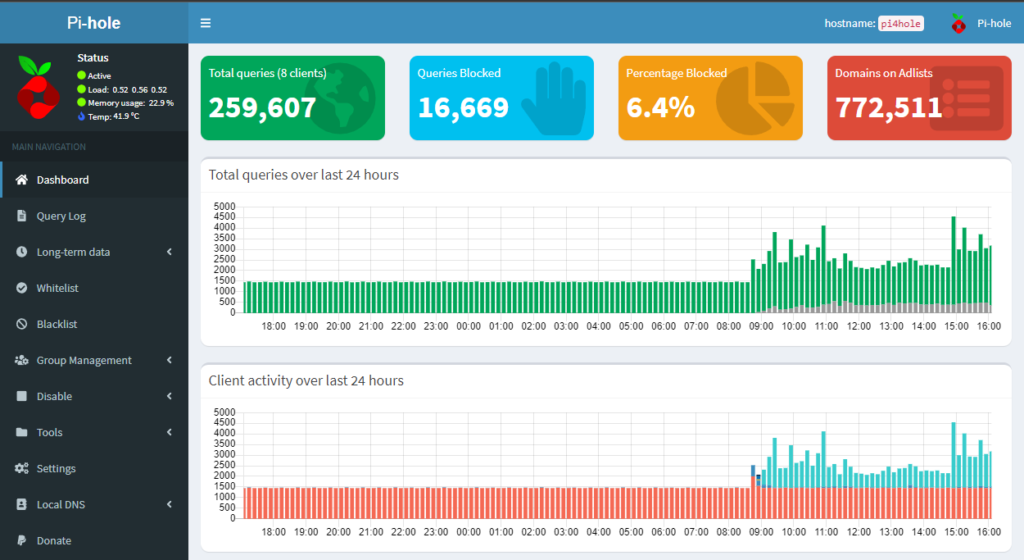
Now you will see the Pi-hole dashboard
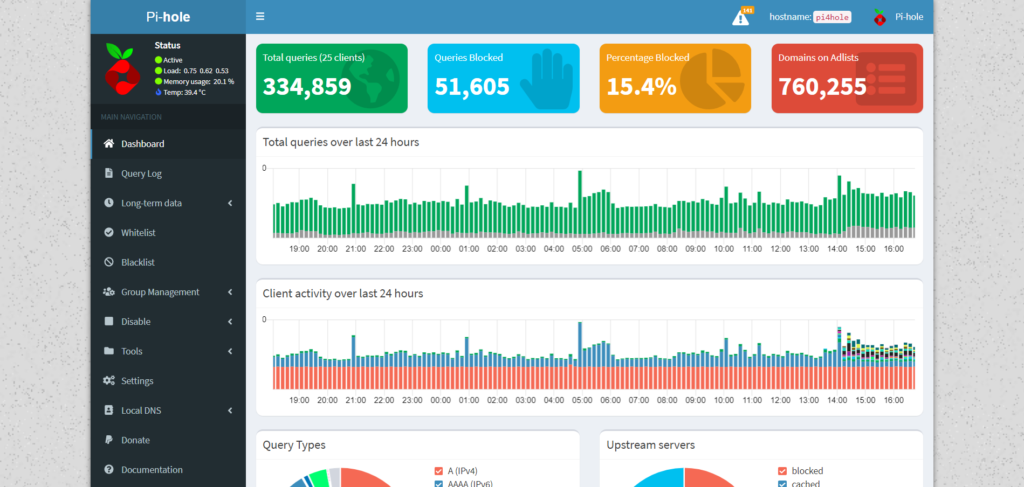 I would recommend you to have a look around here, but don’t change any settings yet
Step 5:
Now you need to set the Pi-hole as your DNS server for your computer/phone/tablet if you just want to set it up on your device, BUT I would recommend you to set it on your router which means all the devices on your network will be connected to it with out having to fiddle around with settings on all devices. You will need to search for ‘[Router Name/Model] DNS settings’ and find out how to change it on your specific router. You need to enter your IP address like 192.168.xx.xx and that’s it.
NOTE: Do not set a 2nd DNS or backup DNS server as this will circumvent the ad blocking capabilities
End Note
Now you have setup you Pi-hole, you can follow my other guides below for enhancing you Pi-hole experience for Privacy and Security
Comments powered by Disqus.