
Why I chose PhotoPrism?
I gotta say, when I first stumbled upon PhotoPrism, it was like a ray of sunshine on a cloudy day. The website promised ease and simplicity, and after playing around with their demo, I was practically doing backflips at how much I could do without relying on the big G.
But of course, I’m not one to settle for the first shiny object that catches my eye. I did my due diligence and explored other options, like hosting my own cloud on providers like OVH or AWS. However, the cost was just too steep for my humble needs. Plus, the thought of my precious memories being stored on some stranger’s machine just didn’t sit well with me - after all, that was the whole reason I wanted to ditch Google Photos in the first place!
Since I’m currently an iPhone user, I decided to investigate Apple Photos. Their recent move to include end-to-end encryption was certainly tempting, and I knew it would come in handy. So I uploaded all my photos from my computer using the iCloud sync app, after downloading them from Google Takeout. But then… dun dun dunnn… I discovered a major issue.
All the dates and times were wrong in the Apple Photos app. I’m talking ALL. THE. DATES. Basically, any photo or video that was sent to me or screenshot was all dated the same as when I uploaded them from my computer. Not cool, Apple, not cool.
But being the resourceful person that I am, I stumbled upon ExifTool. I figured it’d be easy to fix since Google Photos provided an exif.json file with all my photos from the library. But boy, was I wrong… After countless attempts, I just couldn’t seem to get the data to transfer over to Apple Photos. So, I knew I had to find another solution.
And that’s when PhotoPrism came back into the picture. With my background in self-hosting, I figured it wouldn’t be too bad. But, as always, I was wrong… again! But hey, I’m nothing if not persistent, so I soldiered on, and now my DSL is running like a well-oiled machine.
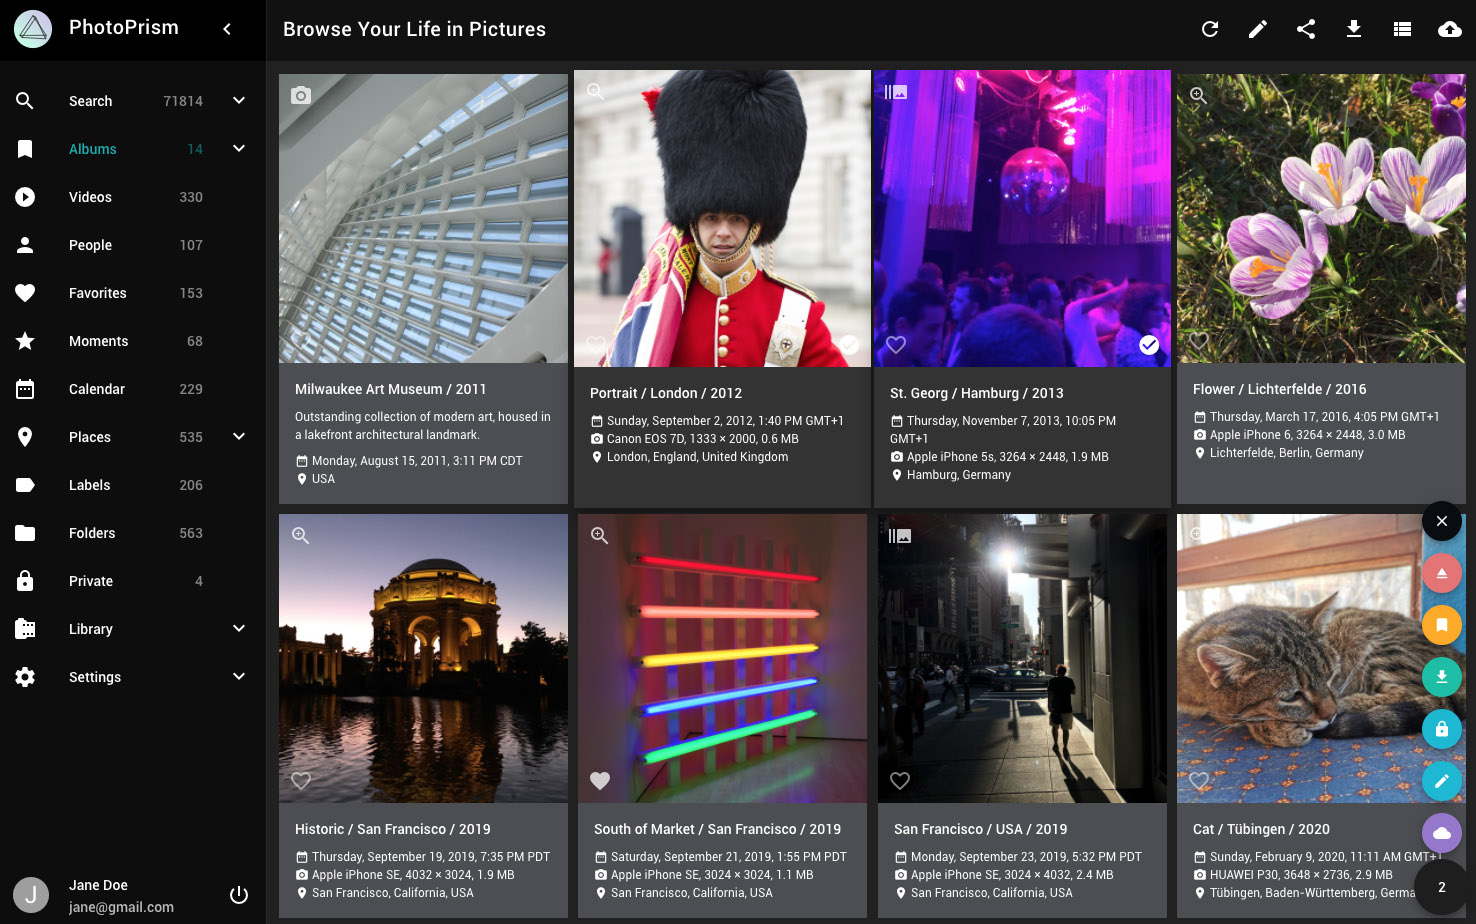
Setting up PhotoPrism
After successfully setting up PhotoPrism as a docker container, I pointed the originals folder to my NAS where I had all my photos downloaded, and let it do its job of indexing the directory. However, in a moment of sheer brilliance (or not), I attempted to mount the drive and put my data folder on the NAS as well. Big mistake. Once the indexing process was complete with all 40,000 pictures, I restarted the container only to discover that I had lost everything!
Feeling frustrated, I decided to give it another shot, but my luck didn’t seem to change as I lost the data for the second time. It was then that I realized it was time to switch to Plan B. I stored the data on the trusty old Pi itself, which had a massive 128GB SD card, and to my relief, everything worked just fine!
After this little hiccup, I let it index one final time, and lo and behold, it worked like a charm! Once all the faces were indexed, I got down to business - naming the most important faces, getting rid of duplicates, and combining faces together. Phew, crisis averted!
Using PhotoPrism
After a bit of a rocky start, I finally got PhotoPrism up and running like a well-oiled machine! I mean, who doesn’t like losing all of their data twice, right? But hey, third time’s the charm and I finally figured out that the Pi was the way to go.
Now, thanks to PhotoSync on iOS, I can rest easy knowing that my precious photos are being automatically backed up to the cloud every night. And the best part? I get a notification every morning telling me that it was a success! It’s like a little pat on the back for a job well done.
And let’s not forget about the data issues I was having. But fear not, my DSLR-loving friends, for the metadata is now synced up and inferred from the time and dates. So now all of my photos, no matter the source, are organized and ready to be admired.
All in all, I’m thrilled with how everything turned out. In fact, I’m so happy that I decided to sponsor the PhotoPrism project on GitHub. It’s my way of saying thanks for a great product, and keeping my fingers crossed for some extra features in the future!
Comments powered by Disqus.